


Overview
This manual describes April Tag workflows in Trimble Field Link 6.6 and later with the Ri total station. This covers April Tag printing and setup, survey collection, auto stationing setup, and troubleshooting. The feature is designed to run on the Trimble Ri total station.
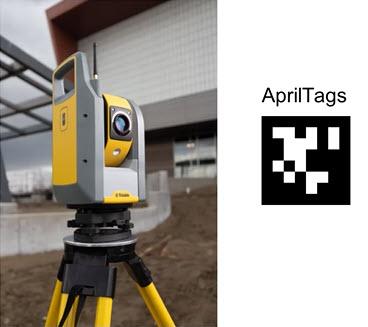
April Tags
An April Tag is a family of printable square targets similar to QR codes. As of FieldLink v6.6, TFL supports April Tags designated by a 6x6 internal bit grid that encodes the tags identifying number. These tags will be used for instrument setup on a job site. The next sections outline all necessary steps to utilize Trimble FieldLink’s April Tag capabilities for instrument setup using the Trimble Ri.
Printing
Tags can be printed using any standard office printer on white paper. Contrast is the most critical factor for measurability and weight for long-term usability. For indoor use, we recommend ultra-white semi-heavy paper such as 98 Bright 28lb Laser Paper. For long-term or outdoor use, we recommend matte vinyl prints or water-proof plastic paper such as 14mil TerraSlater Paper.
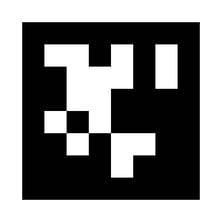
Images
Images are found in the Trimble Ri April Tags Printing Document. The April Tags found in this document can be printed and placed on your job site.
Adhering
Moisture will expand and distort paper fibers over time bowing a letter-sized paper sheet 5mm in the middle. Thus we recommend placing tags using four adhesive points directly behind the four corners of the black April Tag border.

The adhesive can be double-sided tape or looped tape. We recommend Foam Mounting Tape or MultiSurface Blue Tape, although because tags are so light most tapes will function well.
Setup Guidelines
April Tags installed similarly to reflective cateyes and foils, thus the same placement guidelines should be followed:
- 3 tags minimum but 4+ are recommended
- Height ±1m of the total station
- Tilt no more than ±5°
- >5m of any planned placement of the total station
- On 3+ cardinal sides of the total station
- Avoid placing the tags beyond the planned working area
- Avoid collinearity and coplanarity
- Avoid uneven lighting (shadow edges, streaks, etc.) on tags
- >2m separation between each tag
Project Setup
The total station should be placed more than 5m from the nearest April Tag with >3° line-of-sight separation between tags. The device should be leveled and pass leveling calibration. In the event of a calibration error, all April Tag workflows will cancel and need to be restarted after calibration is done.
Once the April Tags are placed in strategic locations on the jobsite, their location on the job site needs to be recorded in order to use them for instrument setup. The steps to do so are to create a blank project, perform a no data setup in the blank project followed by April Tag location collection.
The below steps outline in detail this process.
Connect to Device
- Turn On Trimble Ri device and wait for start up.
- Start TFL and connect to Trimble Ri
- DEVICE > CONNECTION.
- Select the available Ri device, click CONNECT on the bottom right, and wait for the instrument to connect.Start TFL and connect to Trimble Ri
- Once connected, the app remembers and auto-connects to the instrument and this step is not required.
Create an Empty Project
The empty project is used to collect the April Tag locations as control points if no existing control points exist in a project. Below are the steps to create a new blank project.
1. First, go to MORE > PROJECTS > MANAGE > CREATE (in the bottom left).
2. Name the project then select CREATE in the bottom right.
3. Click ![]() to create a job from a blank point file then select CREATE.
to create a job from a blank point file then select CREATE.
4. Then select OPEN to open the blank project.
Note: If existing control points exist in the project (that are NOT April Tags), then these can be used by the Ri total station for station setup (resection) and the No Data Setup isn’t required. Then the next step would be to capture the location of the April Tags.
No Data Setup
There are two ways to perform a no data setup: North facing setup and, two point north facing setup. The two icons that describe the two no data setup options are described in FieldLink User Guide v6.6 or later.
- Select
 - Point the device and select SET, or
 - Select
 - Set DR laser mode > Turn on the camera.
 - Measure the ground for elevation > Measure two points creating a line pointing north.
- Then turn off the camera > Select the two points as North and Base > SET.
April Tag Collection Workflow
The collect workflow measures April Tags into a FieldLink project. In FieldLink v6.6, the FieldLink April Tag collection workflow involves manual turn-to and automatic measurement of three points on each April Tag. Once in frame, the Trimble Ri will automatically lock onto the April Tag.
Below are the steps to collect April Tags in FieldLink v6.6.
- Go to MEASURE > COLLECT
- Select the April Tag icon
 - the camera automatically turns on.
 - Point the total station towards an April Tag manually in TFL or turn the physical device until the April Tag is in the camera frame.
- Click the shoot button at the top right to start measuring.
- Each collected tag is added to the job with the next increment name from the previous point. The first anchor point will show in the point view while the two supporting points will be hidden but linked internally. The April Tag ID will be noted in the description.
- Repeat for each tag.
- Verify and rename if desired in
 > POINT MANAGER.
Note: April Tag locations are stored and therefore collection only needs to be performed once. Also, note that more tags can be collected later at this or any other station in the project.
Autostation Workflow
Determining instrument location on the job site by performing a resection requires at least three collected April Tags.
Below are the steps to perform a resection with April Tags using the Trimble Ri.
- Go to DEVICE > SET UP.
- Select NEW SETUP if setting up multiple times in one session.
- Select April Tag setup >

- Point on the first April Tag manually.
- Click START, the automatic April Tag stationing process will run for about 1.5-2 mins.
Note: If not pointing to tag on start, a sweeping search will start at the current horizontal angle. - On completion, the station will be calculated and a setup summary viewer will appear.
- For more info, click on a point and select Show Residuals or (de)select point with Include Point.
- Select Store Instrument Location checkbox to create a new project point at the current station.
- Complete by clicking SET on the bottom right.
Station verification can be checked by verifying layout points.
- Collect one or more points in the real world to use as layout points.
- Go to MEASURE > LAY OUT.
- Make sure the instrument is in DR laser mode.
- Select any point and the total station will automatically turn to the physical point using the laser.
- Observe the difference between the laser and the real point.
- Repeat for more points as desired.
Known Bugs
On autostation, pressing start triggers an auto focus. Tags detected during this tend to be partially detected, noted as unmeasurable, and ignored for the rest of the process. Ensure the April Tag is centered in frame to avoid this problem. Add firmware/software version to the end of the document.
Supported Firmware, Software and Tablets
FieldLink
- FieldLink v6.6 and later
Ri
- Recommended firmware is 3.2.247 and later
Supported Tablets (As of FieldLink v6.6)
- T100
- DTR301Y

